
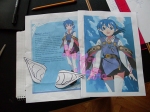
A következő áldozat:
- Eredet: Tales of Xillia
- Karakter: Elise Lutus
- Mikor: Nyári MondoCon 2015

The next victim is:
- Origin: Tales of Xillia
- Character: Elise Lutus
- When: MondoCon Summer 2015


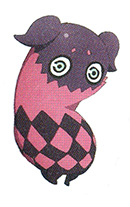
Az első dolog, ami az Elise jelmezemből elkészült, az Teepo (vagy Tipo, kinek hogy tetszik), a beszélő baba volt.
Hozzávalók:
Először is megterveztük a szabásmintát. Ez csak ilyen tessék-lássék géppel rajzolt. ^///^; )
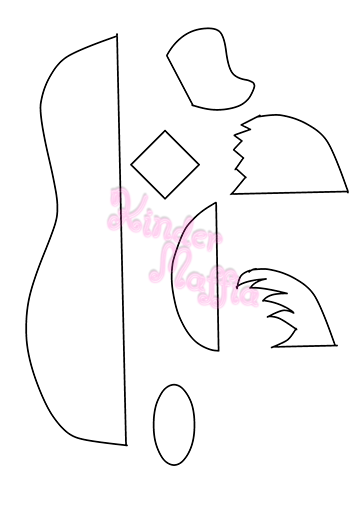
Utána megterveztük és kinyomtattuk a szemét.

Az apró darabokat kiszabtuk. Először oldalanként felvarrtuk a részleteket, mint például a fejen a sötétlila, valamint a testen a fekete részeket (vastagabb filcből), majd következett az oldalak összevarrása. A legnehezebb a kockás minta és a fejrész beközepelése volt. Valamint az, hogy két ugyanolyan icipici rózsaszín filcdarabot vágjunk ki és varrjunk fel – lehetőleg egyvonalban.


Ezután szépen megtöltöttük a testet és alul összevarrtuk.


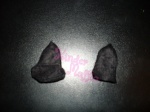
A farkinca, a tappancsok és a fülek varrása volt már csak hátra. A tappancsokhoz papír- és hobbiboltokban kapható vékonyabb fekete filcet használtunk. Menet közben döbbentünk rá, hogy jól megszívattuk magunkat, amikor szusszanásig tömtük szegény kis Teepót, mert a hátralévő darabok felvarrásánál majd’ leszakadt a kezünk. ^////^;
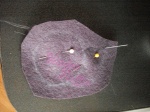

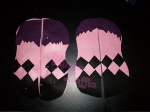
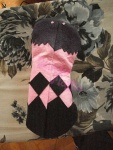
Itt láthatjátok a majdnem kész plüssöt:


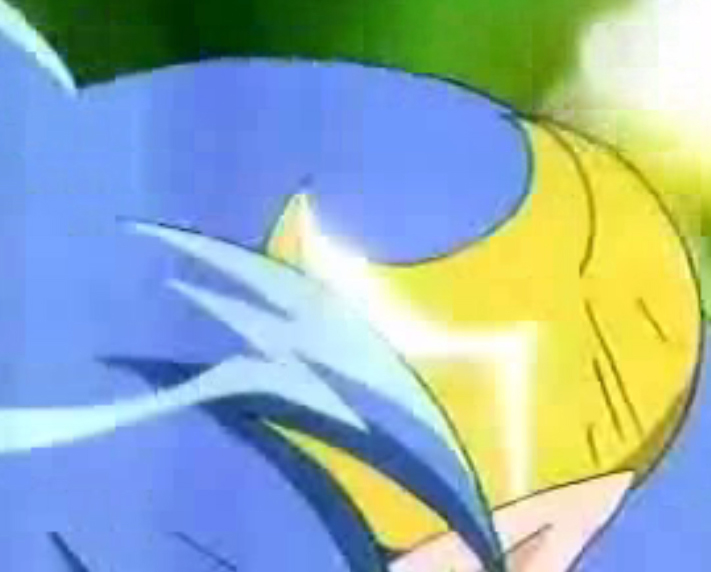
És végül, de nem utolsó sorban: a szemek. Eredetileg pólóra vasalható matricával szerettük volna megoldani a szemeket, de csak nem akart rátapadni sehogyem a filcre, ezért inkább a kicsit élethűbb üveglencse + papír megoldásnál maradtunk.

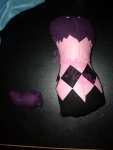
És a kész baba:
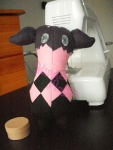

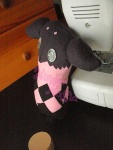
Már tudom: az egész jelmezben ő lesz a kedvencem. 🙂 ❤

The first thing which was made of my Elise costume was Teepo (or Tipo, suit yourselves), the talking doll.
Ingredients:
First of all: we had to make the sewing pattern. (This one is a rough sketch on comp. ^///^; )
We drew and printed the eyes.
We cut the little pieces out. First of all, we had to put all the little details on the bodyparts, like the purple head, the black squares (thicker felt), etc, then sewed the whole body together. The most difficult part was to make the squares and the head fit well. Not to mention: cutting those itty-bitty pink squares the right size, then sewing them up into a straight line. Phew.
We filled and closed the sewing of the body.
Only the tail, feet and ears were missing from the to-sew list. For the feet we used a softer felt which can be bought in hobby-stores. During work we had to realize that we made a though work for ourselves, because we stuffed the little guy so much it was so hard to sew the pieces on that our fingers nearly got torn in the end. ^////^;
You can see the almost done doll below:
And for the last but not the least: the eyes. Originally we wanted to print the whole thing to a transfer paper, but poorly it didn’t want to stay on the felt, so we got stuck with the more realistic resin lenses & paper combo.
The finished doll:
I already know: he’s going to be my favourite out of the whole costume. 🙂 ❤
A következő áldozat:
The next victim is:

Hú, de rég voltam fent. O.O Sajnos a Tavaszi MondoConra nem mehettem el, mert beteg lettem. A cont egy fotózással pótoltuk. Celes-ék féltek, mert rossz időt mondtak péntek délutánra. Emiatt négy helyszín helyett csak kettőre sikerült elmenni: a Malom-völgybe és a Papsoka templomromhoz.
Celes eljött értem suliba, majd náluk átöltöztünk és indultunk a Malom-völgybe. Itt készültek – szerintem – a legszebb képek.
Ezután a templomromhoz mentünk. Először félve kezdtem bele én is, mert volt ott két motoros srác, de szerencsére hamar le is léptek. Kár, hogy nem sütött a nap, mert akkor tovább maradhattunk volna és kinézhettünk volna még Tihanyba a két másik helyre is. Mindegy, majd legközelebb.
Nagyon jól éreztem magam, de sajnáltam, hogy nem maradhattunk tovább. A képeket a Galériában találjátok.
Wow, I haven’t been up for a long time. O.O Poorly I couldn’t go to MondoCon Spring 2015, because I fell sick. We made up for the convention with a photoshoot. Celes and my uncle were afraid, because the reports told a bad weather for Friday afternoon. Due this we could go to only two locations out of the four: the Mill Valley and the Papsoka Ruins.
Celes came to the school to pick me up, then went to their place and we both dressed into our costumes. We went to the Mill Valley first. In my opinion the best pictures were taken there.
Then we went to the church ruins. We started taking pictures shyly at first, because there were two motor-bikers there, but thank goodness they left not much later. It’s a pity that the sun wasn’t shining, because we could’ve stayed longer and could go to Tihany to the other two locations. Oh, well. Maybe next time.
I really had a good time. I wished I could had stayed longer. You can find the pictures in the Gallery.
Bocs, hogy ritká(bba)n írok. Elég sok még mindig a dolog a nagy napig.
Hozzávalók:
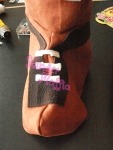
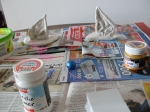
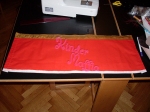
Celes-szel nem tudtuk szétfeszíteni a függönykarikákat, hogy beleerőszakolhassuk a fagyöngybe, kellett a nagybátyám segítsége.


Ezután Celes lefújta őket aranyra. Ezután következett a cipők talpa is. Sajnos valami vacak ragasztót használtak a cipők készítésénél, amely miatt csúnyán megfolyt a festék.

Egyszerűen körberajzoltuk a cipőket az anyag mentén. Kiszabtuk a csizmák tetejét, a díszcsíkokat és a díszpántot.

A csizmadarabokat ezután géppel összevarrtuk, majd a díszítést kézzel vittük fel az anyagra.


Celes poénból megszámolta, egy fél pár csizma összevarrása közben hányszor böki meg az ujját: 31-szer.
A csizma tetejét és a csizmát összevarrtuk, majd következtek a cipőfűzők és a pántok.

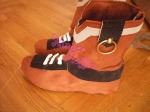
A legutolsó a karikák felragasztása és a cipőragasztás volt. Tada!

Sorry for not writing much lately. There’s still a lot to do before the big day.
Ingredients:
We couldn’t stretch the curtain rings with Celes in order to force them into the beads, so we needed my uncle’s help.
Celes painted the finished rings with golden paint, then coated the soles with brown paint, too. Poorly due some lace shoe-glue which was used by the shoes’ making made the paint roll down on the sides of the shoes ugly.
We made the base of the bootcovers pretty simple: just traced the shoes on the fabric and sew them together. We sewed the top of the boots along with the ornaments, too.
We sew the main pieces with sewing machine and the ornaments with hand.
Celes counted out of curiosity how many times did she prick her finger with the sewing needle by making of a half pair: 31 times.
We sewed the top of the boots and the base together, then put the laces and the straps on.
And the last but not the least: we glued the rings on, so did we to the bootcovers to the shoes. Tada!
Jó régen írtam. A múlt héten sűrű vasárnapunk volt Celes-szel. Több dolog is elkészült/készül.
A következő ruhadarab, amit megvarrtunk az Rena tunikája volt.
Hozzávalók:
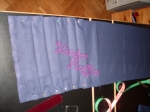
Egy kantáros miniruha szabásmintáját módosítottuk, derékmagasságban pedig nyitva hagytuk. Tada!

Kiegészítők közül a következő Rena félhold alakú csatja volt.
Hozzávalók:
Alapul az animében látható félholdat vettük. A formát két körből alakítottuk ki. Az egészet megformáztuk süthető gyurmából, lefestettem, majd a hátuljára ragasztottuk a csat alapot. (Biztonsági okokból én még nem használhatom a ragacspisztolyt.)
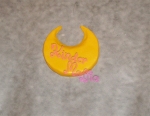
Ez még mindig készülőben van. ^///^
Hozzávalók:
Az előkészületeket Celes-re bíztam. Lemérte a füleimet, megrajzolta a mintát, majd az egészet megformázta levegőn száradó gyurmából. Myuria füleinek hibájából okulva most állítva készítette el a mintát, melyet elkezdtem szépen latex-szel bevonni. Ez még sajnos készül, a végső képeket majd később töltjük fel.
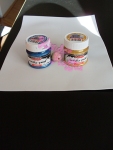
A kettőnk ruhájához tartozó gyöngyöket és Celes sapkájának lapjait festegettem még. Szép lassan, de biztosan elkészülünk. 🙂
És végül, de nem utolsó sorban, nagy munka közben:

It’s been a long time since I wrote here. We had a busy Sunday last week with Celes. A lot of things had been/are being made.
The next piece of the costume which was sewed was Rena’s tunic.
Ingredients:
We modified a sleeveless dress’ sewing pattern for this one and left it open by the waist. Ta-da!
The next one of Rena’s accessories was Rena’s crescent hair-clip.
Ingredients:
We took the anime’s crescent as the model. The basic form was constructed of two circles. We made the whole thing out of oven-hardening modelling clay, then I painted it and we glued the hair-clip base to the back of it. (Due some safety causes I’m still not allowed to use the hot-glue gun.)
Still in progress. ^///^
Ingredients:
I left the preparations to Celes. She took the measurements of my ears, drew the pattern and modelled the whole thing out of air-hardening clay. Learning from her past mistakes with her Myuria ears she turned the positives up, giving them soles. I started to cover them with liquid latex. This is still in the making progress, so more pictures are coming soon.
I painted the wooden beads for our costumes, also Celes’ hat’s planes. We take it in slow steps, but we’ll be done very soon. 🙂
And the last but not the least, in the middle of the work:
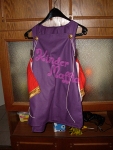
Végre valahára elkészült a köpenyem is.
Hozzávalók:
Elkészítés:
Talán az egész jelmezben eddig ez okozta a legnagyobb fejtörést. Már csak a minta miatt is, mivel lycrát idő hiányában nem tudtunk rendelni, a környéken pedig venni lehetetlen.
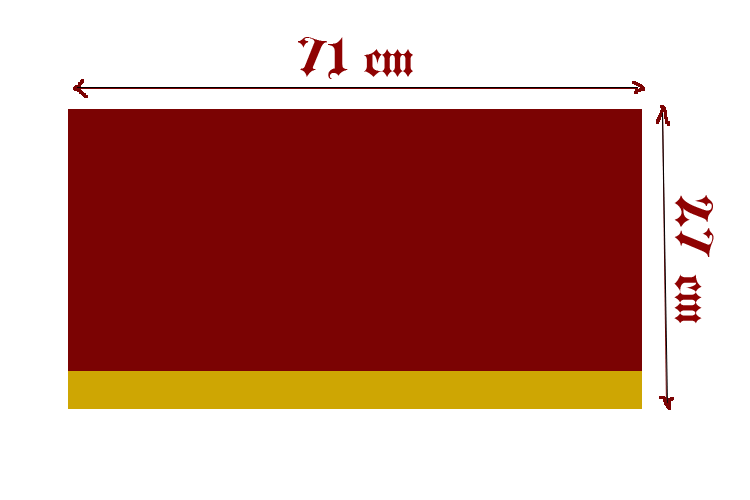
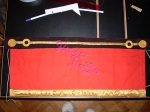
Itt láthatjátok a köpeny alapjának méretezését. Először a piros és fehér kartont varrtuk össze, majd a piros aljára felvarrtuk az arany szatént. A köpeny felső részét sötétbarna műbőrből vágtuk ki, majd a külső felére félbehajtott aranyszínű ferdepántot varrtunk. A dekoráción sokat gondolkoztunk. A szatén szóba sem jöhetett. Végül a dekorguminál maradtunk. A fagyöngyöt lefestettem metálkék akrilfestékkel, a dekorgumikat lealapoztuk és lefestettük. A száradás sajnos sokáig tartott. A műbőr belső felére felvarrtunk mindkét oldalon a fehér gumiból egy-egy felet, valamint egy-egy hurkot is. Ezután a műbőrt rávarrtuk a kartonra. A száradás után a dekorgumikat felragasztottuk a műbőrre. Voi la. A következő lépés a tunika és a blúz lesznek.
My cape is finally done.
Ingredients:
Making progress:
This was possibly this costume’s hardest part due the round ornaments. Poorly due the lack of time we couldn’t order lycra and we can’t buy that fabric around here.
That’s the blueprint of the cape’s base. We sewed the red and white fabrics together first, then sewed the golden satin to the bottom. We cut dark brown leatherette for the top of the cape, then sewed golden bias tape folded in half to the outer part. We thought about the ornaments for a long time. We knew that satin was out of question. We picked craft-foam instead. I painted the wooden bead with the metallic blue acrylic paint, then started coating the craft-foam rings with golden acrylic paint. Poorly the drying process took for long. We sewed to the inner side of the brown leatherette a half of a white rubber band and also a loop of them to each side, then sewed both leatherette parts to the fabric. After the drying we glued the craft-foam rings to the leatherette. Voi la. The next steps are the tunic and the blouse.


Celes-szel elkezdtük a ruhámat tegnap. Itt láthatjátok, hogy is készült a szoknyám.
Hozzávalók:
Rena szoknyája egy egyszerű sötétkék rakott szoknya. A karton jó választás volt, mint anyag, mert könnyen kezelhető, nagyon szépen lehet vele dolgozni, rakott szoknya készítéséhez tökéletes.
A hagyományos módon készült: a csípőbőségem kétszeresét mértük ki az anyagra, majd varrtunk neki egy alsó szegélyt. Ezután kezdődött a hajtogatás, levarrás, majd a derékpánt felvarrása. Utána lemértük, mennyit kell még beljebb venni, bevarrtuk a cipzárt és összevarrtunk az anyagot. Lent láthatjátok az eredményt.
We’ve started making my Rena Lanford cosplay with Celes yesterday. You can see it below how was my skirt made.
Ingredients:
Rena’s skirt is a simple dark blue pleated skirt. Carton was a nice choice because it’s easy to handle, easy to work with and it’s ideal for pleated skirts.
We started it with measuring double my hip’s width on the fabric, cut it, sew the lower hem, and started folding. We ironed and sew the folds, put the waistband on. I tried it to see how does it fit, then sew the zipper in and closed the fabric. Tada! You can see the results below.


Történt egy kis változás a tavaszi tervvel. A Star Ocean: The Last Hope csapatot sajnos el kellett halasztanunk. Addig is egy másik Star Ocean játékból, a Star Ocean Second Evolutionből fogunk cosplayelni, a csapatunk neve pedig The EXPELlables lesz. 😀 Nemsokára töltöm is fel a fázisképeket.
There was a little change in our Spring’s plan. We had to delay our Star Ocean: The Last Hope group due some serious circumstances. Instead of that we’re cosplaying from an other Star Ocean game: Star Ocean Second Evolution with Celes, our team’s name’s gonna be The EXPELlables. 😀 I’m going to post the progress pictures ASAP.
nov 27

This gallery contains 7 photos.
Eredeti bejegyzés Craft Galaxy:
Hali! Itt KinderMaffia! Örömmel jelentem: kész a kis kalapom! 🙂 No, de nézzük, hogy is készült. Hozzávalók: cseresznyepiros pamut barackszínű szatén szalag nagyobb műanyag tölthető gömb fele habkarton lap Pentart matt tűzpiros festék Pattex univerzális erősragasztó ragasztópisztoly éles kés pár hullámcsat sok-sok türelem Ennél a kiegészítőnél rengeteg segítségre volt szükségem…
nov 11

This gallery contains 7 photos.
Eredeti bejegyzés Craft Galaxy:
Tegnap nekiláttunk a ruha gömbjeinek, ékköveinek és a kis kalapnak. Hozzávalók: Pentart napsárga fényes akrilfesték Pentart világoskék fényes akrilfesték Pentart világoskék matt akrilfesték Pentart gyöngyházkék akrilfesték 2 Deka Lack világoskék akrilfesték 5 kicsi ovális üveglencse 2 nagy tölthető műanyag gömb 2 kicsi tölthető műanyag gömb kristály medál piros pamut lazacszínű…
